
Table of Contents (click to expand)
Polaroid pictures work by using a light-sensitive film that is exposed to the incoming light of the scene you wish to capture. The film is then developed in a matter of seconds, producing a negative image. To create the final, positive image, the negative image is exposed to light once again. Instant color films work in a similar way, but use three silver halide coatings that respond to blue, green, and red light. These coatings are then developed with dyes of the opposite colors.
Despite the invention of extraordinary life-like-image capturing cameras actualized by the electronic revolution, anachronistic folks still adore polaroid cameras for the delightful nostalgia they arouse. Polaroid cameras were truly a revolutionary invention. Prior to their existence, colored images were developed through a tedious process of subjecting negatives to coloring dyes in a darkroom. The images wouldn’t be ready to be viewed for days.
However, what Harvard inventor Edwin Land did was compress the darkroom and its myriad chemicals into a single camera. Land then decided to sell his invention. He founded the Polaroid Corporation and made a fortune of $5 million in camera sales in 1949! Due to his corporation’s immense success, just like Xerox, the corporation’s name became synonymous with the technology’s name – instant cameras are still commonly referred to as Polaroid cameras and instant film as Polaroid pictures. So, how do they work?

The Basics
At the turn of the century, we began digitizing images, transmuting them into pixels and storing them in memory cards. However, there was no such technology back in the 1950s. Back then, film couldn’t be developed instantaneously. A film is a plastic sheet covered with silver halides. A halide refers to any of the electronegative elements that reside in group 7, the halogen group, or simply, the column beside the noble gas column. Thus, a silver halide refers to any combination of silver and either fluorine, chlorine, iodine, bromine etc. These films are extremely sensitive to light, so they are processed and manufactured with space-dark coatings to avoid any pre-exposure to light.
When you press the ‘click’ button on the camera, in a fraction of a second, the shutter opens, and the light-sensitive film is exposed to the incoming light, to the scene you wish to capture. The incident light energy disturbs the molecules of silver halide covering the film. The energy ionizes the compound and extracts individual metallic silver atoms. The amount of silver atoms produced is proportional to the amount of exposed light. Thus, if you’re capturing a tree standing in broad daylight, the area of film exposed to the sky would be suffused with more silver atoms than the area exposed to the tree.
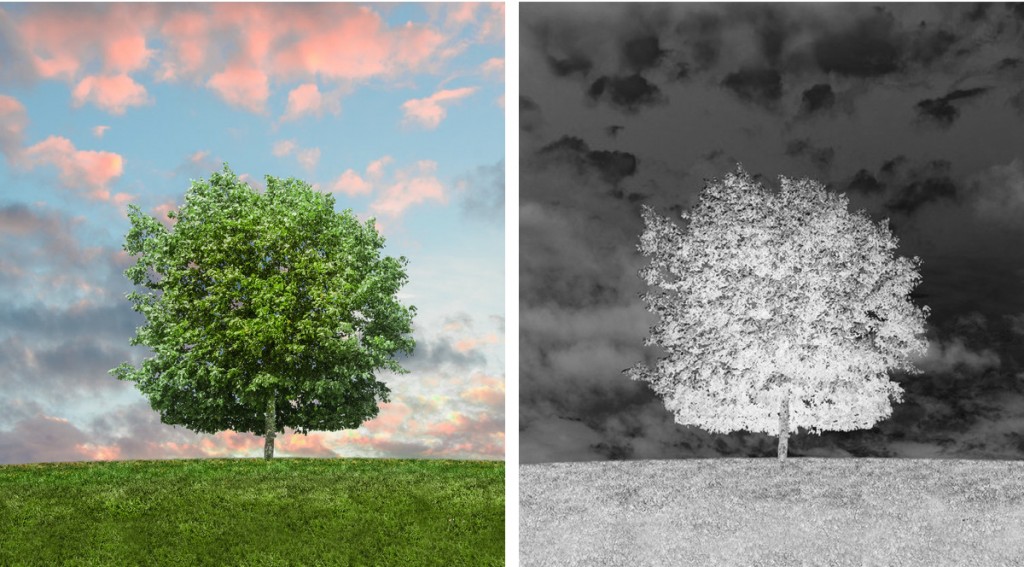
Due to the dense accumulation of silver atoms, the film exposed to excess light is rendered much darker than the areas that are less exposed. The canvas is now painted in the exact opposite colors of the scene that we wanted to capture. The ‘reverse’ image carved on the film is called a negative image. To produce the original or positive image, like the rules of multiplication, we must take a negative image of this negative image.
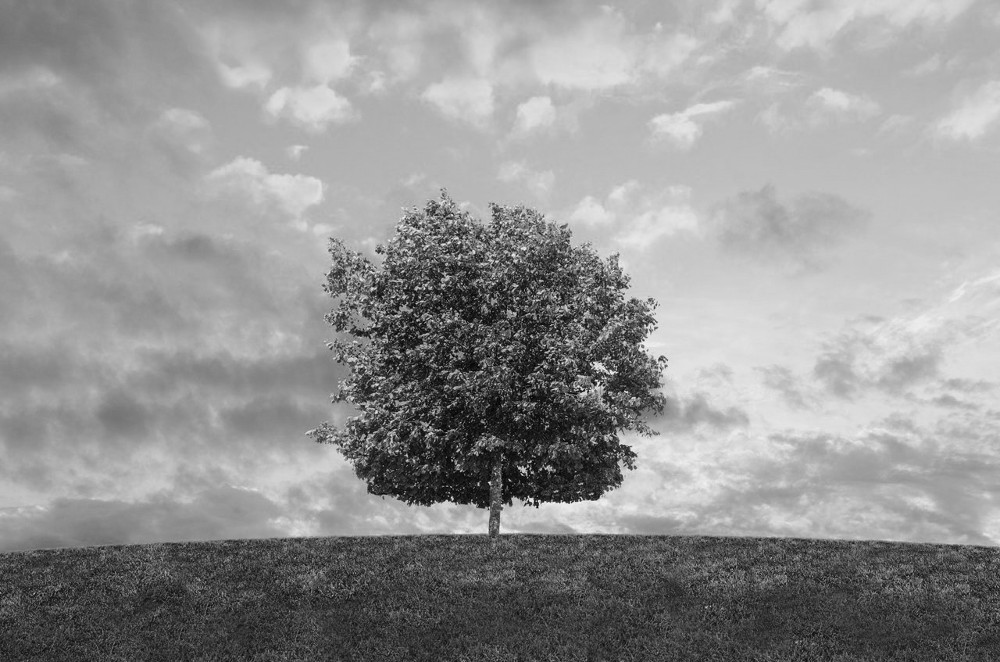
If one wishes to generate a black-and-white image, one must expose the negative to light once again. Now, the dark parts prevent the light from passing through, whereas the silver halide in the previously unexposed brighter parts of the film ionizes to produce silver atoms and, therefore, darker colors. The darker areas are now white, and the brighter areas are now dark. The colors are reversed once again, so what is created is the original, positive image!
Also Read: Why Are Photographs From The Past Sepia Toned?
Instant Color Films
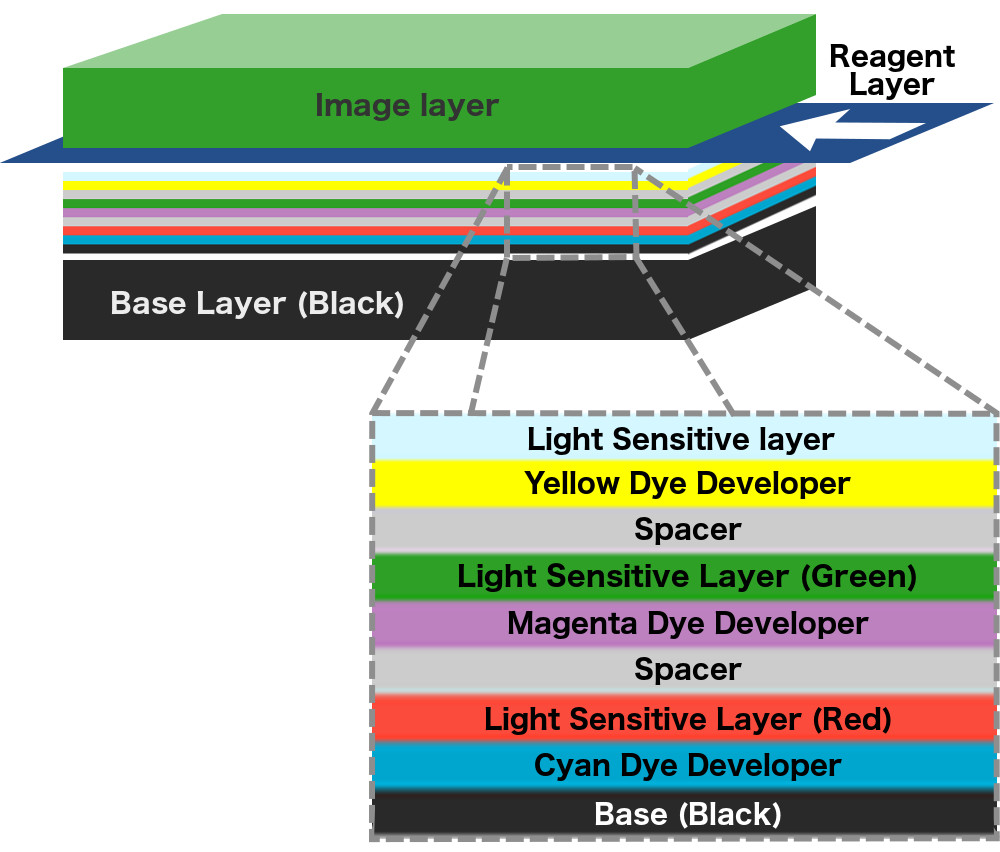
The same principle is used to develop colored pictures. While the process back then was carried out in labs, Land compressed the lab into the camera itself. Instant film is covered with not one, but three silver halide coatings. The first coating (from up to down) responds to blue light, the second to green light and the third to red light.
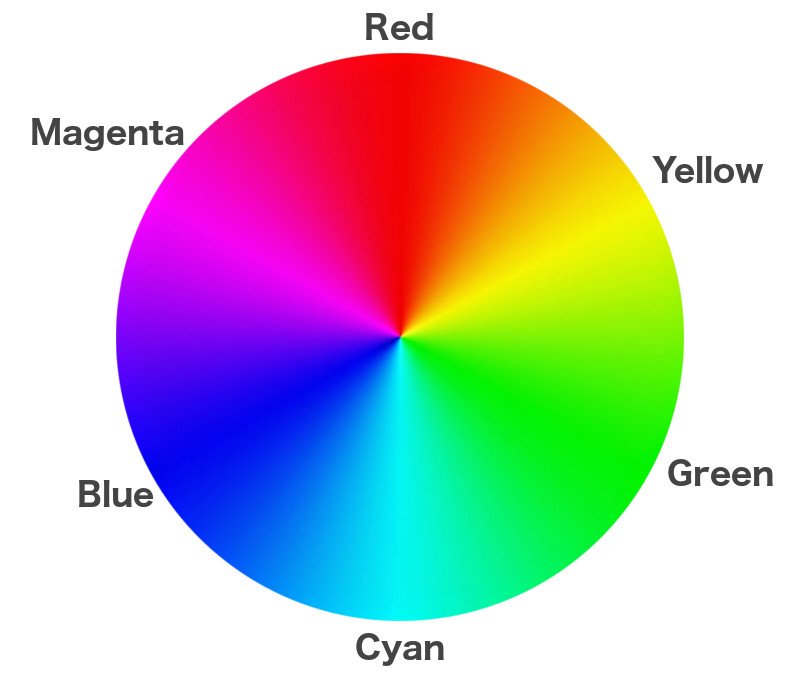
However, remember that when blue, green and red lights fall onto these coatings, the films produced are negatives. Silver atoms in the plates are densely accumulated in those areas that are exposed to more light. In terms of color, the third plate encoded with the information of red light is actually cyan. Similarly, the other two plates are also painted in ‘opposite’ colors: the green plate is covered in magenta and the blue plate in yellow.
Deposited below each plate is a coating of the opposite color: yellow below the blue plate, magenta below the green plate and cyan below the red plate. These are known as developing dyes. The last coating at the bottom is black, which ensures that every speck of light is absorbed, or none is reflected, as this light could distort the image.
Just like the case of a black-and-white image, the application of cyan to the red implements a negative of the negative. It cancels the red areas and reacts with the unexposed silver halides in the cyan areas to form red. Similarly, magenta and yellow react with the green and blue coatings, respectively, to implement a negative of the negative. We know that combinations of red, green and blue can create any color there is, so the three positive plates are then overlaid to form the original, colored image.
The series of layers stack up like dominoes, and just like a set of dominoes, the chain reaction cannot begin without a trigger. The chemical reaction that forces the dyes to move upwards is triggered by a reactive agent or reagent. The reagent is stored in pouches that are adhered to the iconic white space below a polaroid picture. To apply the reagent over the coatings on the film above, a mechanism inside the camera sends the film between two rollers such that the rollers pop the pouch and smear its contents over the film as the film moves forward. In subsequent models, the reagent was applied to another film that was then deposited over the photographic film.
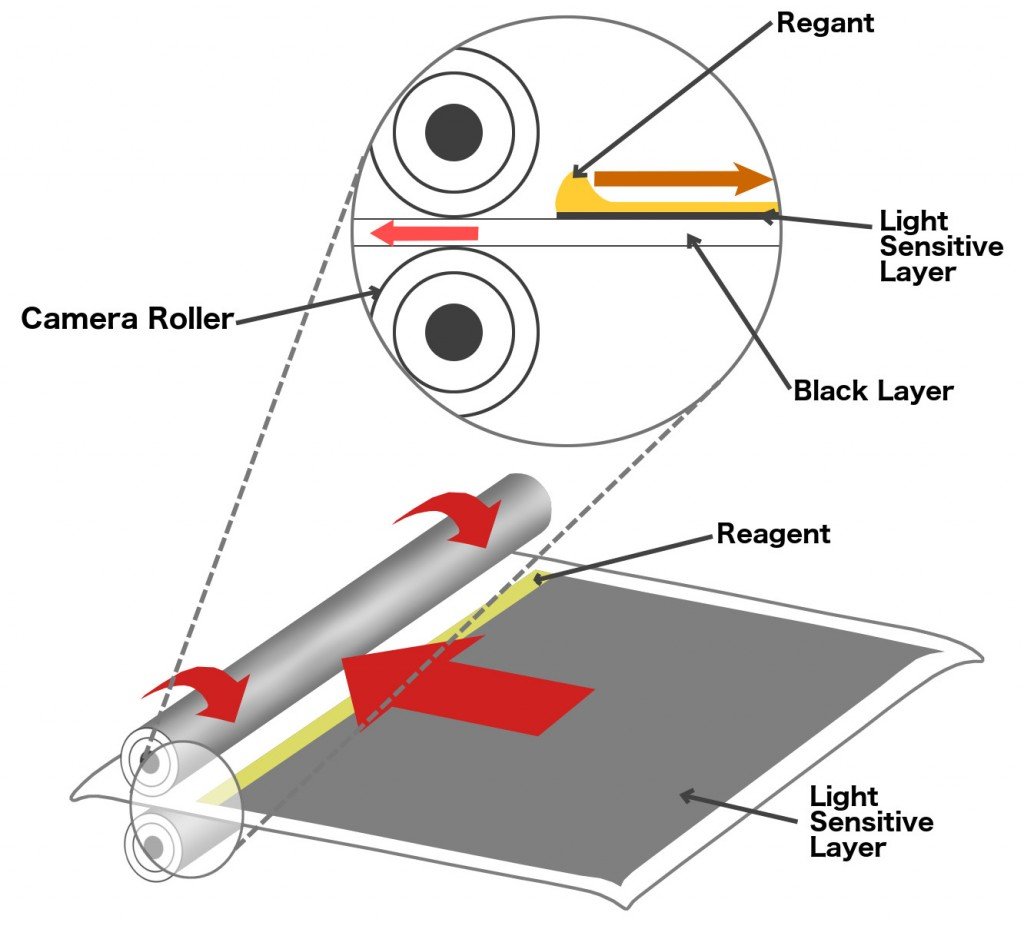
So, as soon as the shutter button was clicked, the film with reoriented silver atoms would be coated with the reagent and a chemical reaction would ensue. The dyes would flow upwards and color the three coatings. Finally, almost immediately, as if by magic, the camera would gradually print a piece of white plastic until it would hang out by its end like the camera’s tongue. The dyes need some time to completely dry, so one can smudge the picture with a Q-tip, to impart a sort of painting effect. The colors that the white plastic exhibits are the result of incident light reflected through the dyes smeared on its surface.
For the simplicity of Land’s revolutionary innovation, he’s considered nothing less than a genius. Also, contrary to popular belief, shaking the plastic is actually bad for the picture.
Also Read: How Does A Photocopier Work?
How well do you understand the article above!
